


.jpg)

Well, I have been down with a sinus infections since last Friday. We had a sad family event to attend over the weekend, so I powered through. My husband's beloved Uncle died suddenly and we attended his wake and funeral service. It was a beautiful tribute to a man who was everyone's friend.
I started to feel better yesterday and have been very busy with my fabric bucket. First I had to iron all the fabric I have been storing since February, then cut all the fabric into strips to fit into the Big Shot, as shown above.

Then I had to cut the batting that goes in the center of the quilted squares, I made the square sandwich, two pieces of fabric cut with the big shot clear scallop square die, with a 3in square in the center.
I quilted the square diagonally both ways.

Here is an assembled bag. It still has ways to go and I will show you the completed project, but just wanted to let you know what I have been busy doing.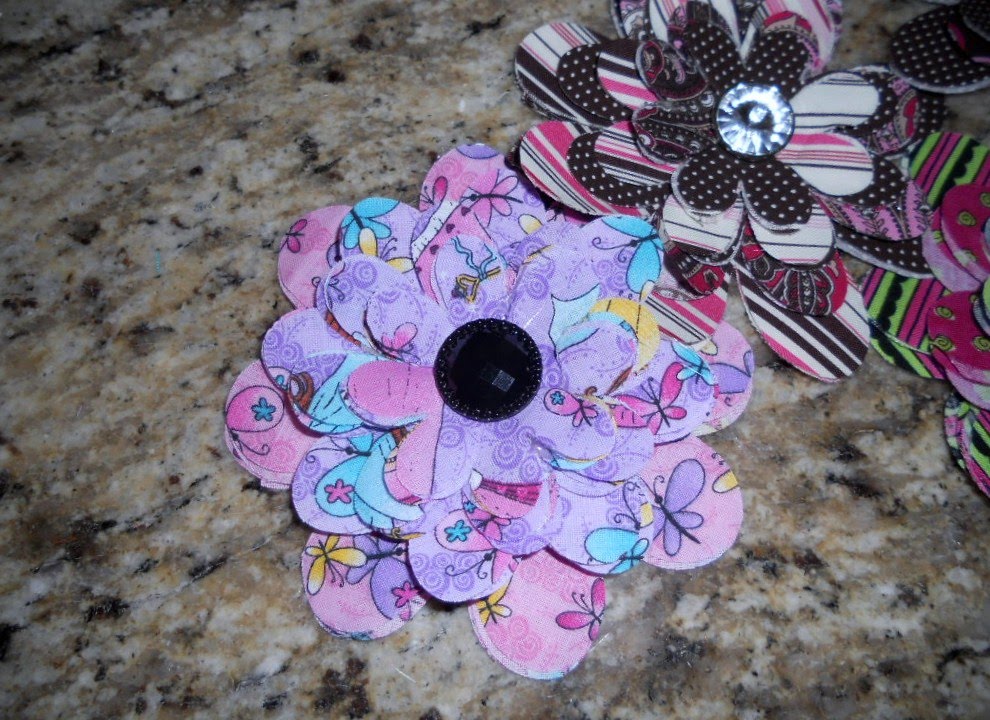
These are flowers made with the large flower die for the big shot, that match some of the rag bags I have been making.
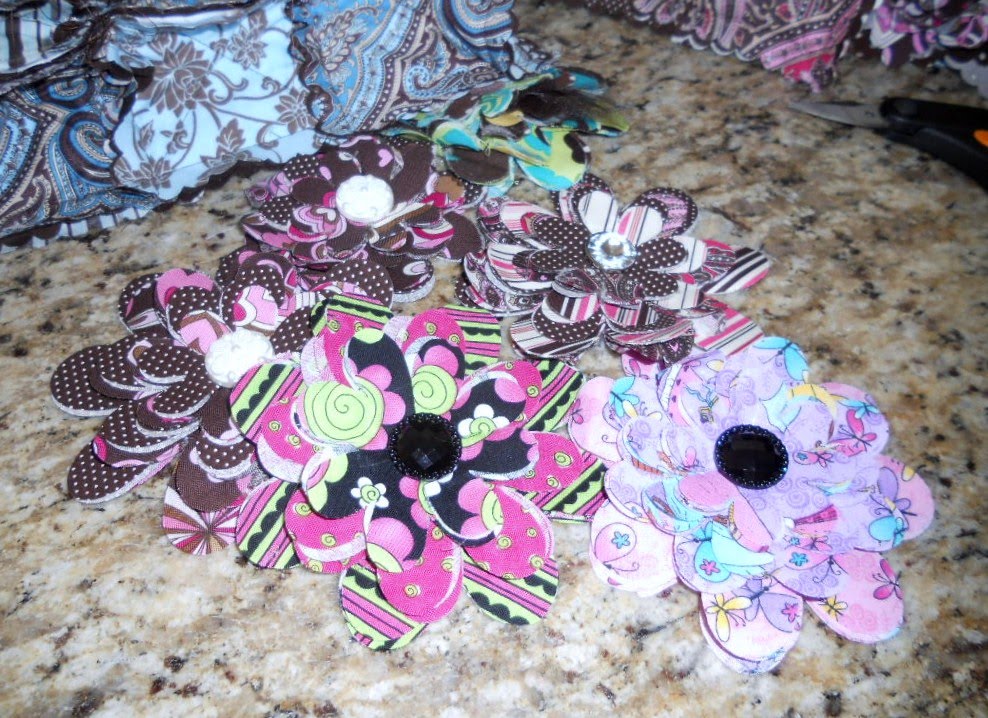

These are flowers made with the circle big shot die. The are made with a syntheic fabric so they can be melted and shaped. I adhered them to a headband.

More to come, I just wanted to show you the progress I have made! My kitchen is crazy with all the stuff spread out!
Thursday, November 11, 2010
Where have I been?
Friday, November 5, 2010
Quick Dasher

This quick Dasher was cased from yet somewhere on the web, I get all my inspiration from so many fellow stampers.
Supplies:
Whisper White Cardstock
Early Espresso Cardstock
Early Espresso Classic Ink
Dasher Stamp
Real Red 5/8 Satin Ribbon
Vintage Wallpaper Embossing Folder
Scallop Trim Border Punch
The base of the card is whisper white cardstock, I used a piece of Early Espresso Cardstock that was 4.25 x 5.5. I used the embossing folder on it then I cut it in half. I then used the Scallop Trim Punch for the border. The ribbon is tied around the Early Espresso Cardstock. It is really a simple card but does look very elegant.
Wednesday, November 3, 2010
With Sympathy....


I unfortunately am in need of Sympathy cards. I made this beautiful one yesterday.
Supplies:
Thoughts and Prayers Stamp Set
Cajun Craze Cardstock and Ink
So Saffron Cardstock
Always Artichoke Cardstock and Ink
Always Artichoke grosgrain ribbon
Jewels From Stampin' Up! - Basic Pearls
Vintage Wallpaper Embossing folder for my Big Shot
Tuesday, November 2, 2010
Who, Who, Who is super cute!

This cute card is made with Designer Paper from Fall 2009, so the More Mustard is a current color, the real rust and the sage shadow are retired. I used Early Espresson for the brown, because I just love how rich it looks. Punch Number 3 in the 2010-2011 Stampin' Up! Idea Book and Catalog. The two step owl. It was much easier than I thought it would be to put together. I used Square Lattice Embossing Folder from the big shot to texture the first layer. Thankful thoughts of you comes from Grateful Greetings.
Monday, November 1, 2010
Fancy Pumpkin!

Big Shot Dies
Large Scallop Circle
Vintage Wallpaper Embossing Folder
Leaves #2
Other Supplies:
Old Olive Cardstock
Pumpkin Pie Cardstock
Very Vanilla Cardstoc
Stamping Sponge
Old Olive Classic Ink
Grateful Greetings Stamp Set
Stampin Up #42 Oval Punch
Stampin Up #19 Scallop Oval Punch
Sticky Strip (a must)
Bone folder
I think that's all! I cased this from somewhere, where is always a mystery to me. I surf the web with a stream of crazy. Here are some quick and dirty directions, where ever I found the pic there were no details so I winged it!
I cut 2 Large Scallop Circle with Pumpkin Pie, then I put them through the big shot with the Vintage Wallpaper Embossing Folder. (one at a time in the embossing folder) I used my Bone Folder to score the bottom to fold over the one edge. I scored it 3/4 if inch from the edge.
To create the box in the center: I am going from my scribble notes on my grid paper, if this doesn't work please let me know. You need to cut a piece of pumpkin pie cardstock to 4.25 by 9.50. On the 9.50 edge score at 3, 4.5, 7.5, 9 on the 4.25 edge score at 1.5. This is a basic box, fold your folds cut your bottom up to the score line, etc.
The handle is old olive card stock, 1 in by 8.5. I secured the handle to the bottom of the box, folded in over and secured it where in landed and it worked great. With sticky strip of course.
I sponged the leaves and ran a few through the embossing folder, I didn't have any DSP that was current and matched, that would look cute too and was on the original I cased this from.
Saturday, October 30, 2010


Friday, October 29, 2010
School Treats


This is the quick treat I made for my daughter's first grade class. It uses the sweet center stamp set from Stampin' Up! and all retired colors. I was using up my only orange, not green galore the lighter bright green, the name totally escapes me, if I remember it or look it up I will update this post and lavender lace cardstock. I inked the stamp up with the stampin spot to really get the good bold inked up look. I used the new super large circle punch and scallop circle. I was pleased with this quick treat goody. It was a half a sheet of cardstock scored in the middle. I mono-adhesived these cute Hershey kiss treats I found at Target to the inside.
Thursday, September 30, 2010
Halloween is coming!

Thursday, June 10, 2010
Matching Cards!

Here is the first card that matches the fancy purse. I used Manhattan Flower Stamp Set and Bella Bleu paper which I love, love, love! I used watercolor crayons to color the flowers and a blender pen to spread the color around. I used a so saffron and barely banana marker to color the stamen in the center, the crayons just were not dark enough for me. I used white satin ribbon to use as an accent. The words are embossed using white embossing powder. The oval was cut using my Big Shot from Sizzox. I punched the wholes in the scallops to add a little more something. I cased this whole card from a pattern I purchased and added by own spin.
This second card was made with pretty much the same supplies as the first one. I did make a slit using a craft knife to add the ribbon.
Two more cards to post for this set! I love, love, love this project!
Saturday, May 29, 2010
Purse Perfect

This awesome purse is made with Bella Bleu Designer Series Paper. I love, love, love this paper. This was a bit an effort, but I love the way it came out. It is made to hold cards. I will be posting the cards over the next few days. I used Manhattan Flowers to create the flower on the front of the purse and for the upcoming cards. I used watercolor crayons to color the flower.
Sunday, May 16, 2010
Awash some more....

This card says created by Stacey Roussin, but really was created by Dania Welch, she just let me make it at her house when I was visiting. It uses the Awash with flowers Stamp Set, and many of the retiring colors. It is an easel card that stands up with you are finished with it.
In Colors

I had a Sympathy card to make recently, I used all in colors plus a texture plate for the Big Shot to make a simple yet pretty card.
Monday, May 10, 2010
Awash with Flowers

I worked Saturday night on a few cards using my new Awash with Flowers set. This is my first attempt using Stampin' Up's version of acrylics stamps. I had a hard time with them to tell you the truth. I think I am a wood block girl. I always knew I was but after struggling with this set I know for sure. I like knowing exactly where I am stamping, however when I wanted to add something I had to keep putting stamps back on blocks and I just seemed to be making a mess. What do you guys think? Acrylics or Wood?
I used the designer paper from the last mini, with Orchid Opulance, Pretty in Pink, So Saffron and Certainly Celery. I haven't used Orchid Opulance much and really enjoyed the color. The greeting set was one from this years Sellabration mini.
I used a texture and my big shot for the So Saffron paper.

I used the Clear Circle Sizzox Die and Large Scallop for this card. I had to use a craft knife to trim the edge of the circle after I mounted it on the card, I enjoy the effect.
Christmas in May?

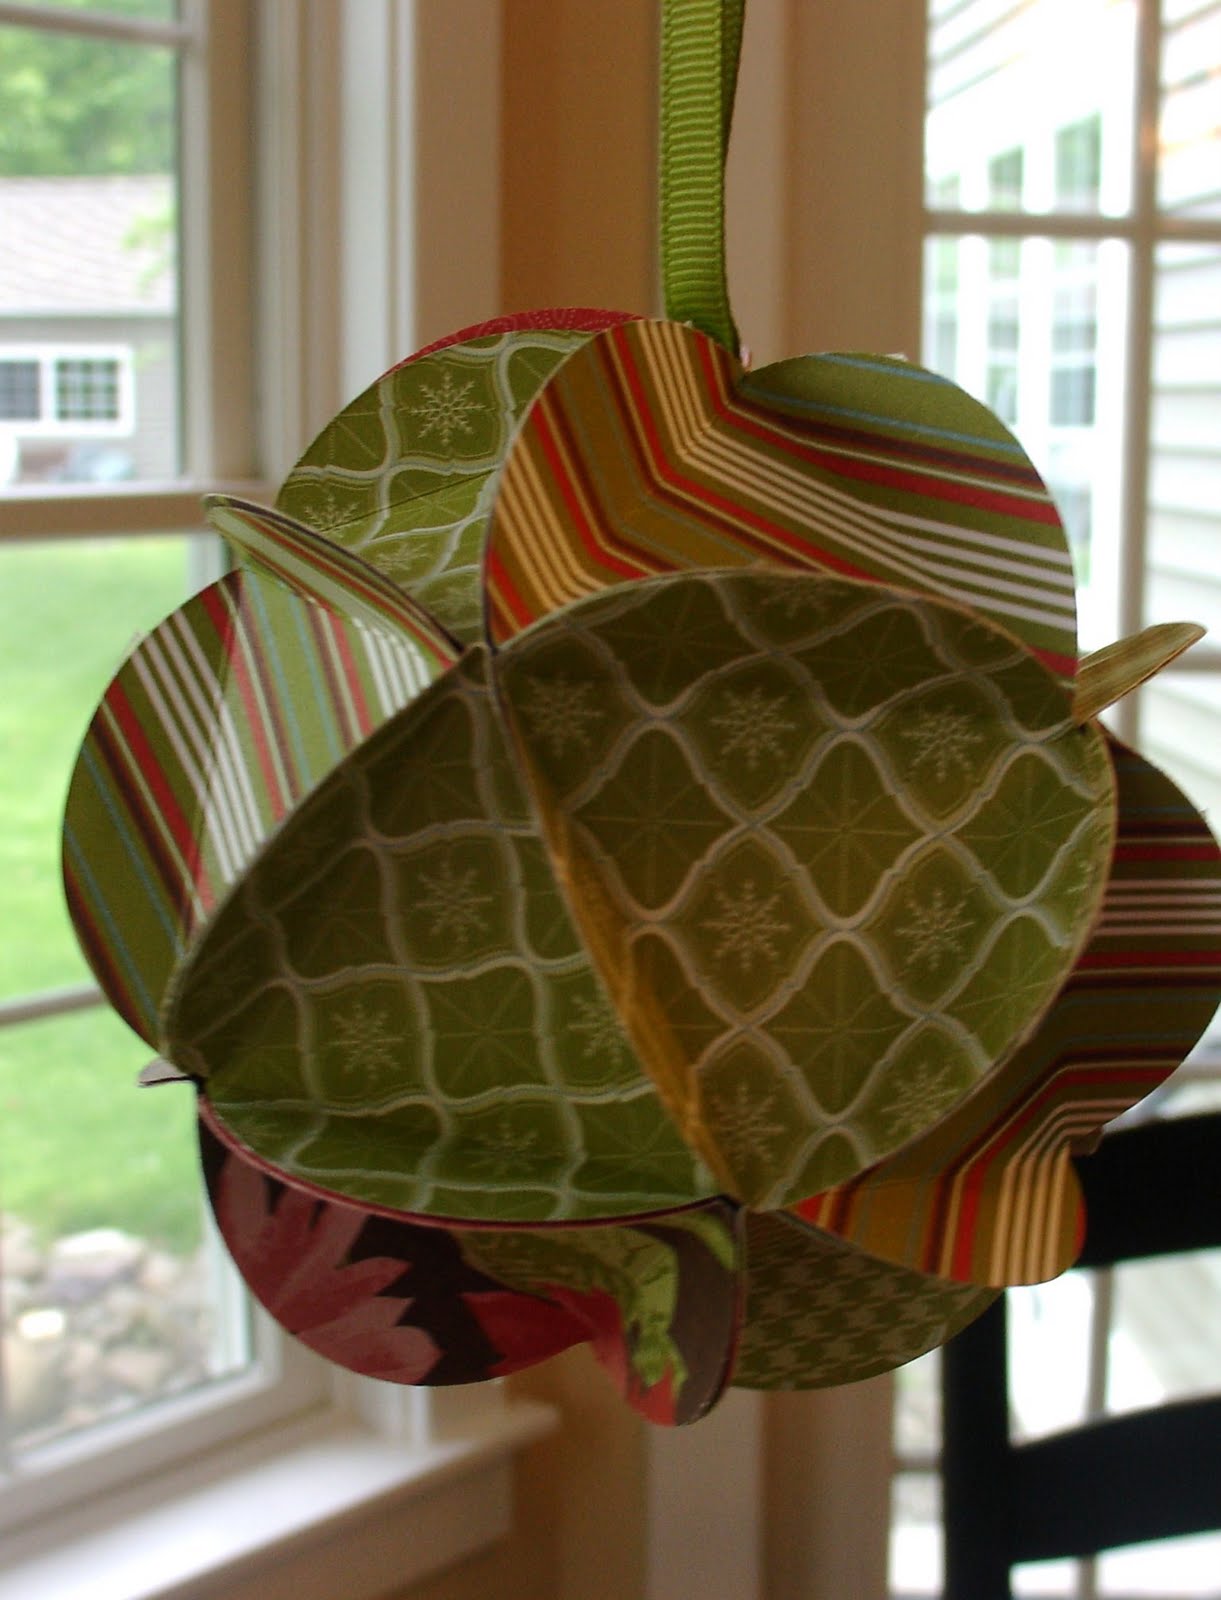
Check out these ornaments we made yesterday. My Mom is working on making items each month for her church fair in the fall. They have a Christmas tree they decorate with ornaments for sale and she wanted the 3D ornament from the Big Shot. It is not the easiest one to make. Once you get the hang out it, it's not bad, it's just trying to figure it out again. It's not like riding a bike, I had to google the directions and really focus during the first assembly. They are so worth it. I also showed her how to make the ball ornament from the six inch strips of decorative paper too.

This is the 3D sizzox ornament. It takes 25 pieces to make this size. You have to use sticky strip or double sided tape, mono is not strong enough to hold this baby together long.
Thursday, May 6, 2010
Scrappin!

Two posts in two days, I am almost officially on a roll. This Scrapbook page was done on my weekend trip with the Scrapbook Divas. The picture of Madeleine was taken on her first day of kindergarten last September. The paper and the layout cam from Close to my Heart. I love the Close to my Heart layout books, Cherish, Imagine and Reflection they really help me showcase my pictures with a great layout.
This was Jack's first day of sixth grade. I was not able to actually stand in the driveway and take the picture so I had to make do with lurking on the porch. The exciting part of this layout were the letter stickers that have been in my scrap gear for a while and they make the apples on the paper look like backgrounds. I really love that look.
Wednesday, May 5, 2010
Mothers Day Cards

I am so happy to say I am stamping again! I have done some scrapping in the past few months but haven't been stamping cards! Well, here are my Mother's Day Cards! I used the Flower Fancy set, I really love, love, love the way these came out. I used Stampin' up!'s mambo melon and razzleberry paper and inks and mambo melon polka dot ribbon. It took me a few times to figure out how to tie the bow so the polka dots showed on both parts. (The polka dots are only on one side).
All items were created by Stacey Roussin, all products, stamped images and colors copyright Stampin' Up! 2010